

Hello Folks ! 🙂 Today I will be showing you how we can easily add a splash screen to our Flutter application. So first thing first, What is splash screen ?
A splash screen is a screen which appears when you open an app on your mobile device. Sometimes it’s referred to as a launch screen or startup screen and shows up when your app is loading after you’ve just opened it. When the loading is finished, you’ll be taken to a more functional screen where you can complete actions.
Now before moving further I expect that you have some basic understanding of Flutter and Dart programming. Also I would expect that you have already setup flutter on your PC. I will be using Android Studio for this tutorial, however you can use your preferred IDE as well.
Project Set Up
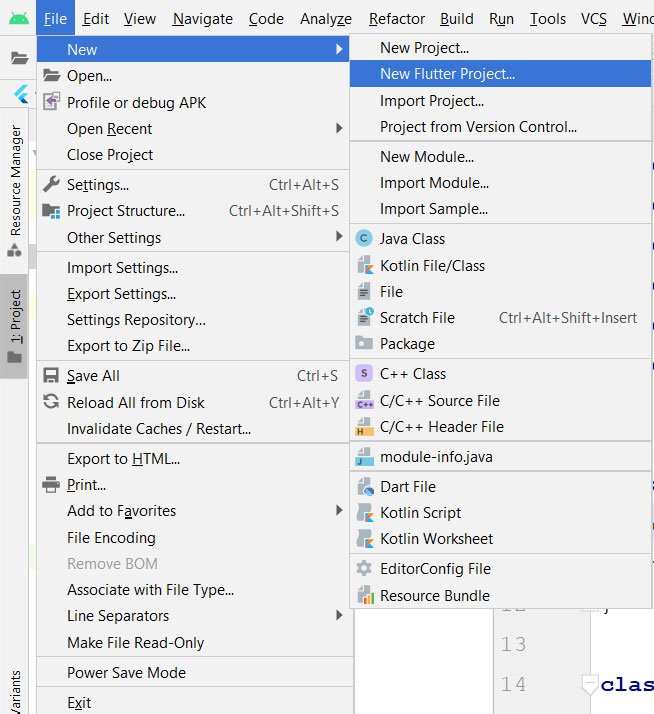
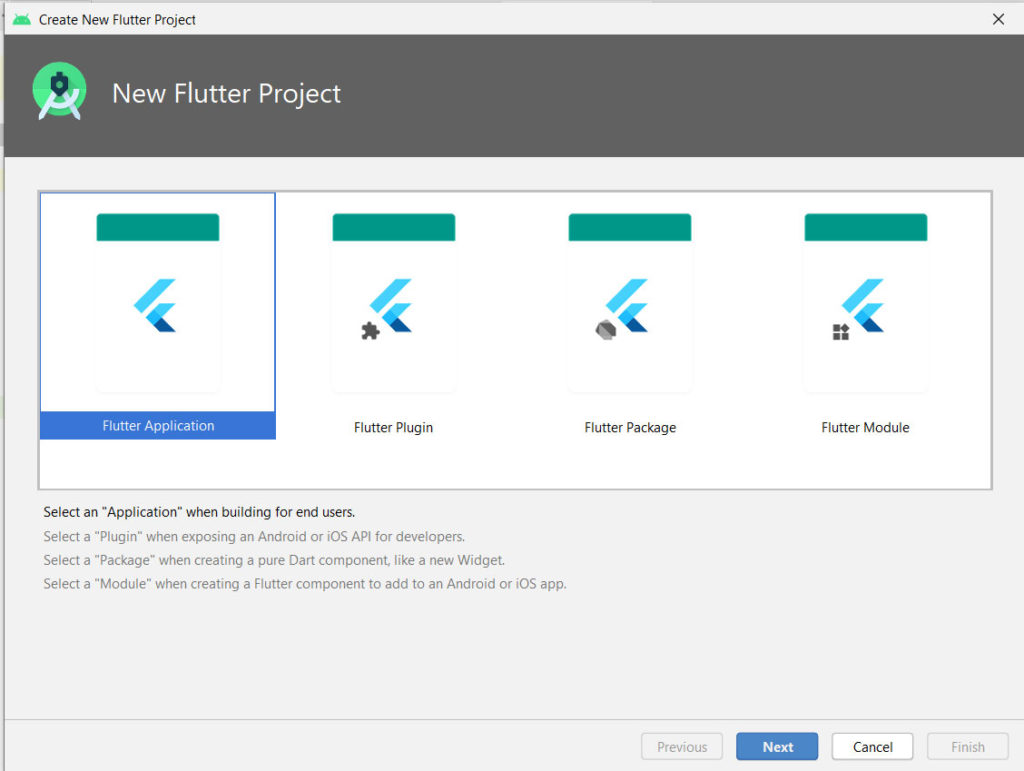
So lets start by creating a new project. For this go to File menu and under New category select “New Flutter Project” and follow the steps as demonstrated below.
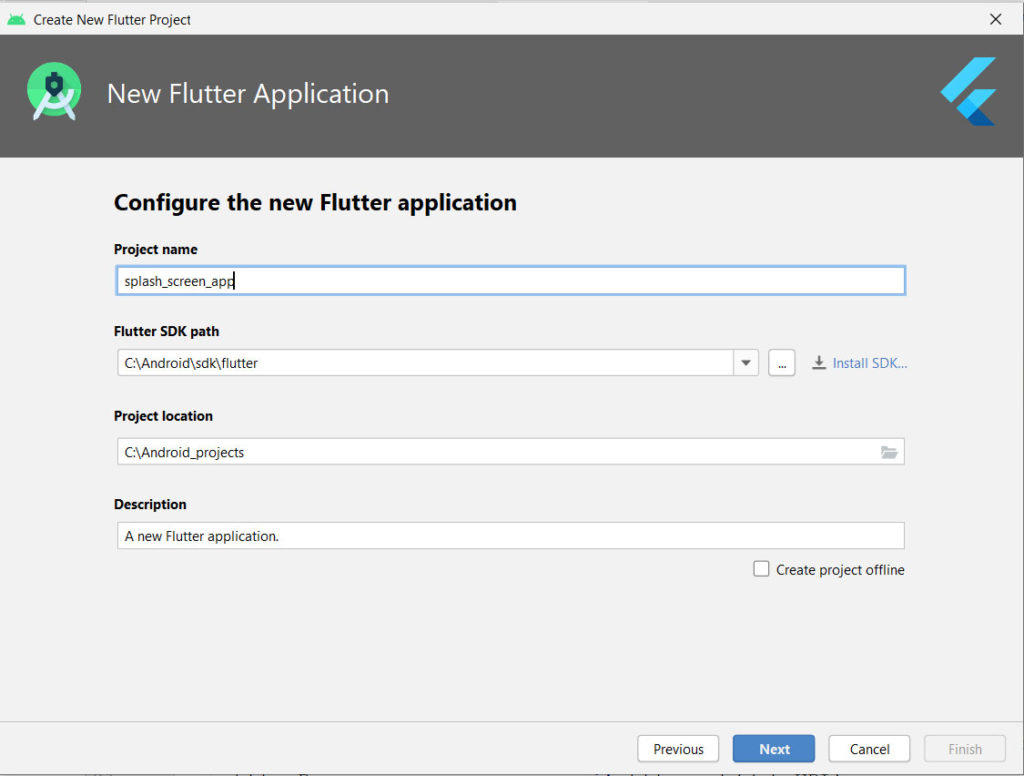
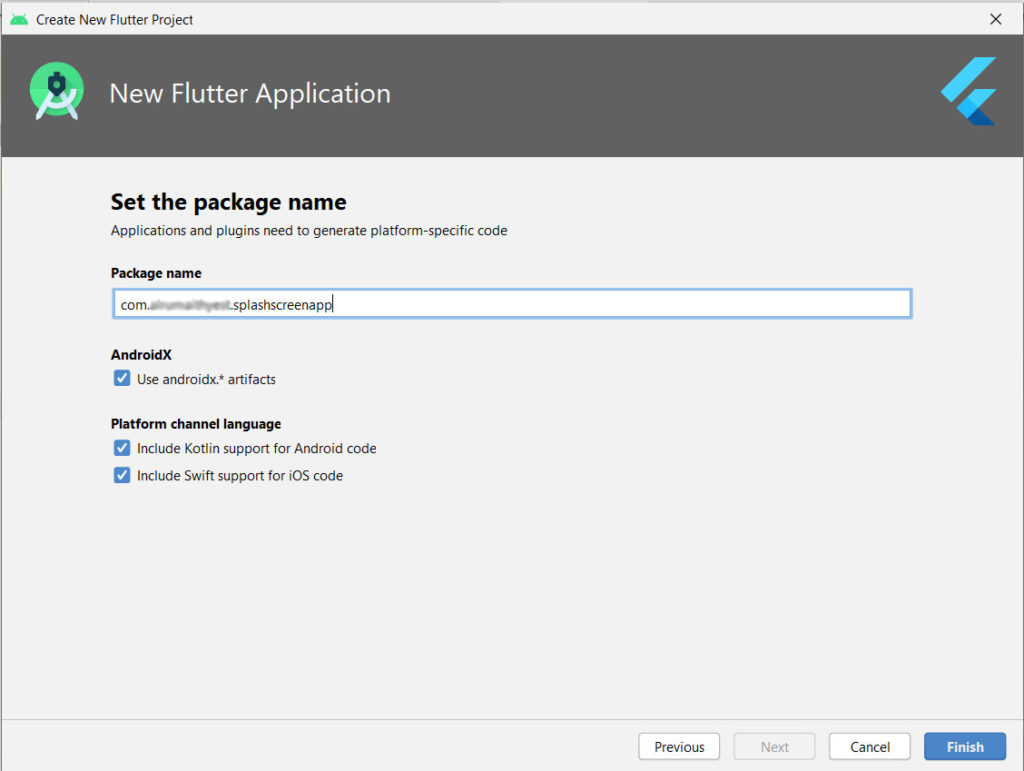
Now setting the project
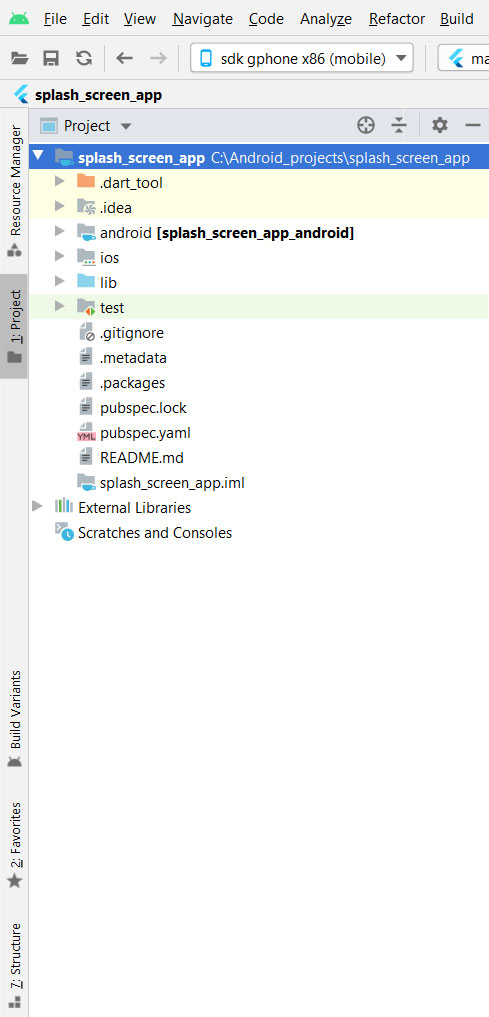
Now once you click “Finish” button you will see a something as below.
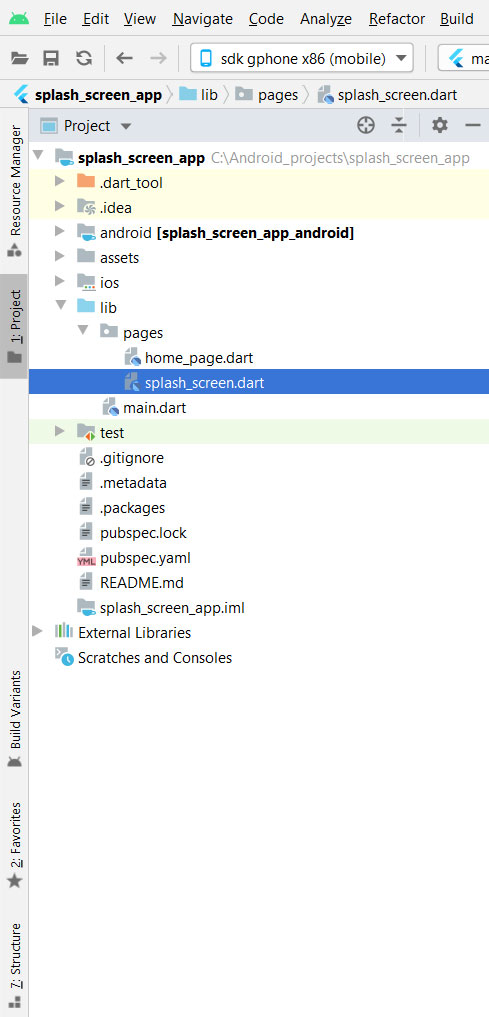
I would like you to have a look on the File structure of the project. As my part of best practices to keep the codes as clean as possible I would organise my project in different folder. I will start by creating a new folder called “pages” under lib directory and add two files as below.
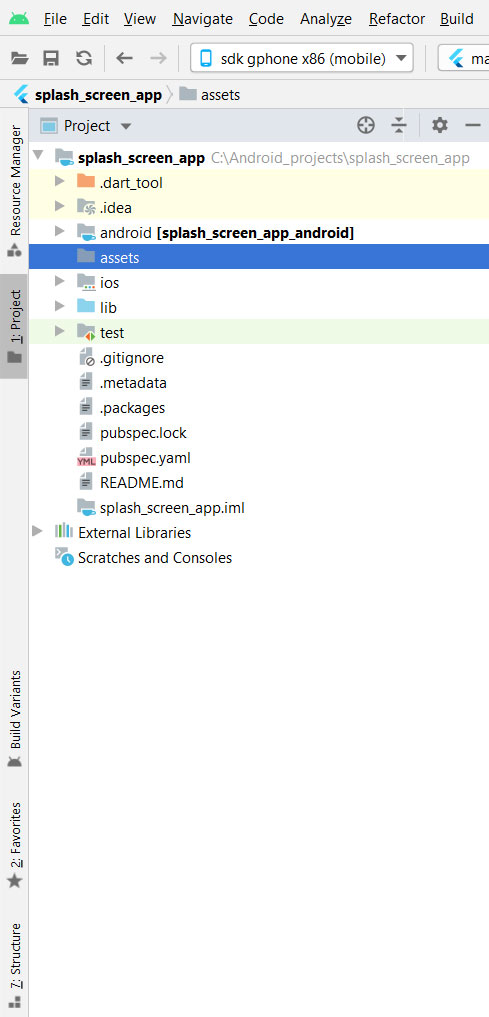
Here I have created one more folder under root directory of the project with name “assets” and add the splash screen image.
Let’s Code
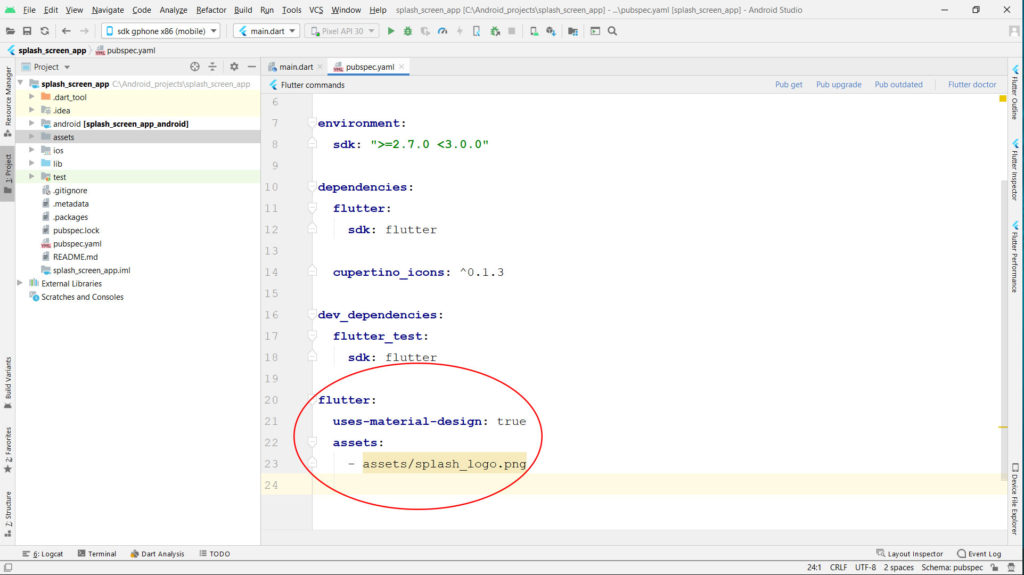
Firstly lets open pubspec.lock file and add below lines under flutter section as shown :
flutter:
  uses-material-design: true
  assets:
    - assets/splash_logo.png
Now open main.dart file and write the code as below.
import 'package:flutter/material.dart';
import 'package:splash_screen_app/pages/splash_screen.dart';

void main() {
  runApp(SplashScreenAppDemo());
}

class SplashScreenAppDemo extends StatelessWidget {
  @override
  Widget build(BuildContext context) {
    return MaterialApp(
      title: 'Splash Screen App',
      theme: ThemeData(
        primarySwatch: Colors.amber,
        visualDensity: VisualDensity.adaptivePlatformDensity,
      ),
      home: new SplashScreen()
    );
  }
}
Our main.dart file is ready and now we will open splash_screen.dart file and add the below code
import 'dart:async';

import 'package:flutter/material.dart';

import 'home_page.dart';

class SplashScreen extends StatefulWidget {
  @override
  _SplashScreenState createState() => new _SplashScreenState();
}

class _SplashScreenState extends State<SplashScreen>{
  @override
  Widget build(BuildContext context) {
    return new Scaffold(
      body: new Center(
        child: new Image.asset('assets/splash_logo.png'),
      ),
    );
  }

  @override
  void initState() {
    super.initState();
    startTime();
  }

  startTime() async {
    var _duration = new Duration(seconds: 3);
    return new Timer(_duration, navigationPage);
  }

  void navigationPage() {
    Navigator.pushReplacement(
        context, MaterialPageRoute(builder: (BuildContext context) => HomePage()));
  }
}
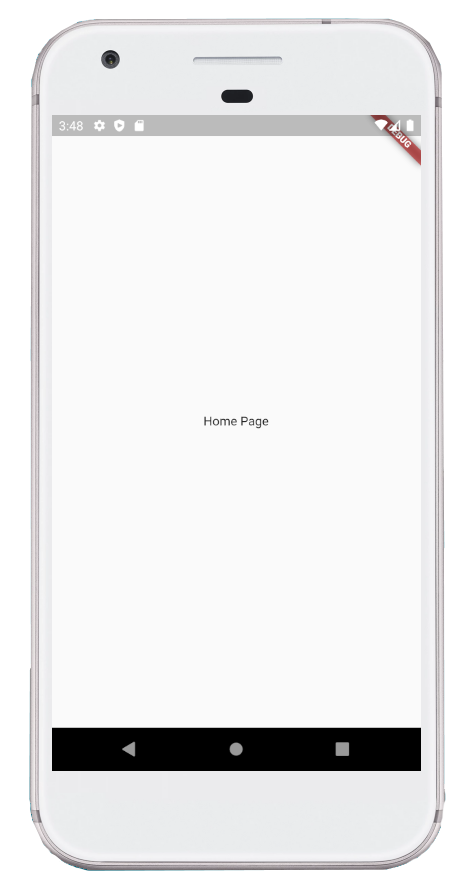
And at last I will add a very simple HomePage design for this project.So open your home_page.dart file and add the code as below.
import 'package:flutter/material.dart';

class HomePage extends StatelessWidget {
  @override
  Widget build(BuildContext context) {
    return Scaffold(
      body: Center(
        child: Text('Home Page')
      ),
    );
  }
}
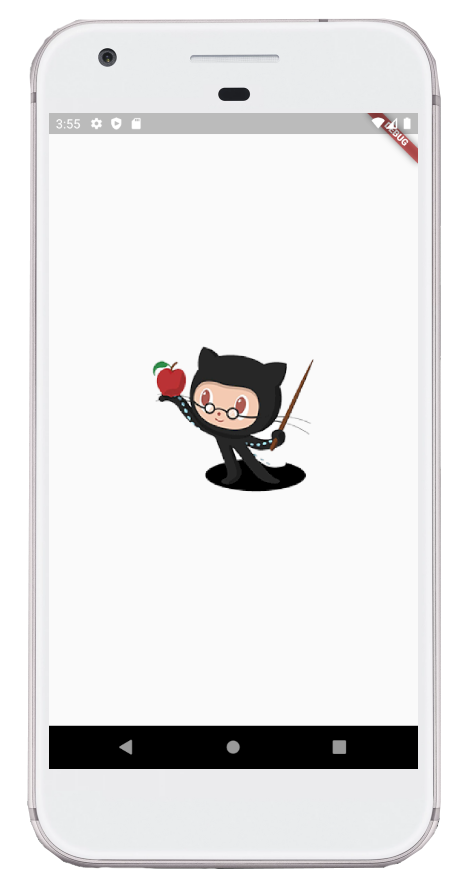
Well thats it ! Try to run the project and if all gets well you will be able to see below screens
For any queries related to the post please do comment below.