
Hello Folks ! Most of us face the scenario where we need to upload bulk data say 2000-3000 records at a time to the database. The most common example would building on ecommerce inventory where your manager told you , “Hey you ! this is the list of all the items to be added in our inventory and I NEED IT TO BE DONE BY TODAY” 😉
That sounds like a nightmare right ! Well these kind of functionalities have become very common and so most of the CMS these days come bundled with them.But what if we are developing our own E-Commerce system and want to add this sytem. Well this is exactly what we are going to discuss in this post,so lets get started.
I am using Laravel framework for this project.For those who are unfamiliar with Laravel, its an amazing PHP framework build on MVC architecture and bundled with so many features. You can learn more about it here . Now assuming you have some idea about Laravel, lets start by installing Laravel first.
If you are using composer then type :
composer create-project --prefer-dist laravel/laravel import_excel_project
Here ‘import_excel_project’ is the project name, you can give any name of your choice.
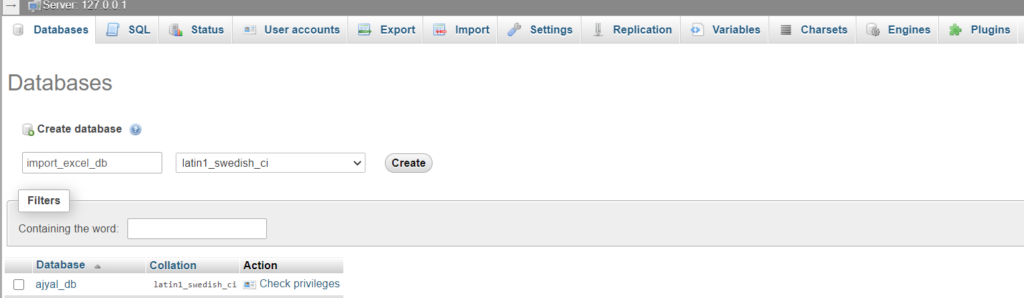
Now lets do the Database part. I will create a database in MySQL with the name ‘import_excel_db’ (you can give name of your choice but remember to give the same details in the config file). I am using PHPMYADMIN to handle my databases. Below is the screenshot of it.
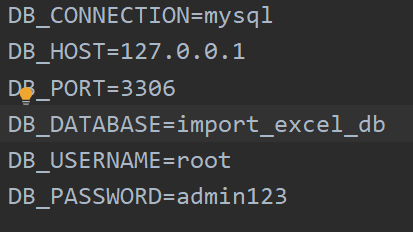
Now lets configure the .env file of our laravel project. So open your project in your favorite editor and open .env file to edit.

Add the details as below (don’t forget to add your own username db name in case its different from mine and your db password).
Now till this part if you have done it right then you will be having Laravel project ready with its database connection.
Now lets create some tables in the database. Type the below command in your command prompt
`php artisan make:model Product -mcr`
This command will create three files in one shot 1 . Product.php under app folder, 2. ProductController in app\http\controllers folder and 3. product migration file under database/migrations folder.
Now write the below command two more times with different model names as below
`php artisan make:model ProductAttribute -m`
`php artisan make:model ProductPrice -m`
You can find all the generated files in their respective locations as discussed above. Lets start by editing our migration files. Enter the below code in your product migration file’s up function.
Schema::create('products', function($table)
{
	$table->increments('id');
	$table->string('name', 191);
	$table->text('description');
	$table->timestamps();
});
Now open product_attribute file and add below code in up function
Schema::create('product_attributes', function($table)
{
	$table->increments('id');
	$table->string('model', 191);
	$table->string('weight');
       $table->foreign('product_id')->references('id')->on('products');
	$table->timestamps();
});
Now open product_prices migration file and add below code in up function
Schema::create(‘product_prices’, function($table)
{
$table->increments(‘id’);
$table->string(‘cost_price’);
$table->string(‘selling_price’);
$table->foreign(‘product_id’)->references(‘id’)->on(‘products’);
$table->timestamps();
});
Now type below command to make migrations in your database
php artisan migrate
This will create all your tables as with the same specifications as mentioned in the migration file.Now we will write the fillable fields in each model classes. Please write the below code :
// For Products Class
protected $fillable = ['id','name','description'];

//For ProductAttribute class
protected $fillable = ['model','weight','product_id'];

//For ProductPrice class
protected $fillable = ['cost_price','selling_price','product_id'];
So now, you have a running application with the database set up.
Now comes the main business of adding records to the three tables in a single shot. I am using this excel file for the demo.
I am using a laravel package for this purpose called Maatwebsite/Excel.For full documentation of this package you can read it here. I would infact encourage you to atleast get familiar with some its basic features so that you can better understand the rest of the tutorial.
So now we will install this package using composer by typing below command on the command prompt :
composer require maatwebsite/excel
Once the package gets installed we will create import files by typing below commands on the command prompt :
php artisan make:import ProductsImport
php artisan make:import ProductInfoImport
php artisan make:import ProductAttributeImport
php artisan make:import ProductPriceImport
Before moving further please note that this tutorial deals with importing data from multisheet excel book.So we will try to import data from each sheet one by one. So lets proceed and write the below codes as below.
<?php

namespace App\Imports;

use Illuminate\Support\Collection;
use Maatwebsite\Excel\Concerns\ToCollection;
use Maatwebsite\Excel\Concerns\WithMultipleSheets;

class ProductsImport implements WithMultipleSheets
{
    public function sheets(): array
    {
        return [
            'Product Info' => new ProductInfoImport(),
            'Product Attributes' => new ProductAttributeImport(),
            'Product Prices' => new ProductPriceImport(),

        ];
    }

    public function onUnknownSheet($sheetName)
    {

    }
}
<?php

namespace App\Imports;

use App\Models\Product;
use Illuminate\Support\Collection;
use Maatwebsite\Excel\Concerns\ToCollection;
use Maatwebsite\Excel\Concerns\ToModel;
use Maatwebsite\Excel\Concerns\WithBatchInserts;
use Maatwebsite\Excel\Concerns\WithStartRow;

class ProductInfoImport implements ToCollection, WithBatchInserts,WithStartRow
{
    public function collection(Collection $rows)
    {
        foreach ($rows as $row)
        {
            Product::create([
                'id'=>$row[0],
                'name'=> $row[1],
                'description'=>$row[2]
            ]);
        }
    }

    public function batchSize(): int
    {
        return 100;
    }

    public function startRow(): int
    {
        return 2;
    }
}
<?php

namespace App\Imports;

use App\Models\ProductAttribute;
use Illuminate\Support\Collection;
use Maatwebsite\Excel\Concerns\ToCollection;
use Maatwebsite\Excel\Concerns\WithBatchInserts;
use Maatwebsite\Excel\Concerns\WithStartRow;

class ProductAttributeImport implements ToCollection,WithBatchInserts,WithStartRow
{

    public function collection(Collection $rows)
    {
        foreach ($rows as $row)
        {
            ProductAttribute::create([
                'product_id'=>$row[0],
                'model'=>$row[1],
                'weight'=>$row[2],
            ]);
        }
    }

    public function batchSize(): int
    {
        return 100;
    }

    public function startRow(): int
    {
        return 2;
    }
}
<?php

namespace App\Imports;

use App\Models\ProductPrice;
use Illuminate\Support\Collection;
use Maatwebsite\Excel\Concerns\ToCollection;
use Maatwebsite\Excel\Concerns\WithBatchInserts;
use Maatwebsite\Excel\Concerns\WithStartRow;

class ProductPriceImport implements ToCollection,WithBatchInserts,WithStartRow
{
    public function collection(Collection $rows)
    {
        foreach ($rows as $row)
        {
            ProductPrice::create([
                'product_id'=>$row[0],
                'cost_price'=>$row[1],
                'selling_price'=>$row[2],
            ]);
        }
        return new ProductPrice([

        ]);
    }

    public function batchSize(): int
    {
        return 100;
    }

    public function startRow(): int
    {
        return 2;
    }
}
Now lets implement our Import class in our controller and design a simple UI for it to get started. Open ProductController.php file from App\Http\Controllers folder and write the below code
public function index(){
$products = Product::all();
return view('products_all',["products"=>$products]);
}

public function upload_excel(){
return view('upload_file',[]);
}

public function import_excel(Request $request){
$this->validate($request, array(
            'file'      => 'required'
        ));

        if($request->hasFile('file')){
            $extension = File::extension($request->file->getClientOriginalName());
            if ($extension == "xlsx" || $extension == "xls") {
                Excel::import(new ProductsImport(), request()->file('file'));
                return redirect('/all_products')->with('success','All products exported successfully !');
            }else {
                Session::flash('error', 'File is a '.$extension.' file.!! Please upload a valid xls/csv file..!!');
                return back();
            }
        }
}
Now lets create view files for this and add below code.
<!--products_all.blade.php-->
<table>
<thead>
<tr>
<td>ID</td>
<td>Name</td>
<td>Description</td>
</tr>
</thead>
@foreach($products as $p)
<tr>
<td>{{$p->id}}</td>
<td>{{$p->name}}</td>
<td>{{$p->description}}</td>
</tr>
@endforeach
</table>
<!-- upload_file.blade.php -->
<form action="" method="post" enctype="multipart-formdata">
<label>Select your excel file</label>
<input type="file" name="file" />
<button type="submit">Upload Data</button>
</form>
Now lets add our routes in web.php file under routes folder.
Route::get('/all_products','ProductController@index');
Route::get('/upload-data', 'ProductController@upload_excel');
Route::post('/upload-data', 'ProductController@import_excel');
Well thats it ! if you have followed each step mentioned you will be available to import a multisheet excel book.For any clarfication or suggestions please comment below.
Happy Coding 🙂